Showing posts with label Sewing. Show all posts

Thursday, 12 December 2013

Making the most of the heat you have

I bought curtains for our front door in the summer.  Yes I was going to make them myself but I found end of line lined curtains at Argos for £15 so there was no point.  Plus I bought the curtain rail but alas they sat untouched for months.  Once I had finished making the blinds for the kitchen my momentum just carried on and I set to attaching the track to the wall.  I had to attach a wooden batten first otherwise the track would have been really difficult to put up plus the curtains would have been too close to the wall.  That done and appeared to be straight onto the curtains.   Had to take a couple of inches off the length and then hand stitch.  With the leftover fabric I made a tie back which was really easy.  I just traced around another tie back to get the shape and used some D rings from old tie backs.

The curtains do clash with the green walls in the hallway but that was the choice of the old owners.  I did think about decorating the hallway before baby arrives but was told "No Way" by the other half spoilsport!  Hopefully next year some time I will paint the hallway beige/cream and the curtains will then match.
Not sure whether they make much difference heat wise as it's not been that cold yet.  But it does get very cold in the hallway so hopefully they will help a bit.


Another thing off the "To do" list and in a quest to spread the heat was drilling a 2 inch holes between the chimney recess above the fire into the kitchen which my dad kindly did for us.  The idea is that some of the heat that rises above the stove now goes into the kitchen.  It does work but hasn't made a vast difference.


And finally we bought ourselves a stove top fan,  we didn't get the original "Ecofan" as these were upwards of £100 but we got one from Ebay which works exactly the same way and was half the price.  This definitely works, it spreads the heat around the room and helps the washing dry quicker.  I would certainly recommend.

Been another busy week with groups and Little L's nativity play (that girl is a star and sooo cute in her costume). Plus I got the lurgy so we have both been ill all week. It's sad but at the moment my post birth craving/want is a lemsip.

Saturday, 7 December 2013

Getting things done - Roman blinds

These last few weeks have been very productive if not a bit exhausting.  The mammoth "Things To do before baby arrives" list has been slowly shrinking and I have done some of the jobs on there that I had been putting off.

Top of the most put off was new blinds for the kitchen.  Now I did make new blinds back in March when I redecorated the kitchen but due to the bulk of the material and the rubbishness of the fittings they would never shut which isn't a problem in the summer but as we have one window that looks out at the front of the house I wanted that one at least to be able to shut during the winter when people walking past can spy into the kitchen.  So over the summer I had been collecting together the bits needed to make the roman blinds mainly from wilkinsons, diy shops and abakhan.  But still I couldn't faced doing them until about six weeks ago when the clocks changed.

Firstly I had to take down and carefully unpick the blinds as I wanted/had to re-use the fabric.


Then I had to make the linings, sew channels in them, sew them to the outer fabric.  Making sure that everything was straight and central.  Hand stitched the side seams.  Attached velcro and hemmed the top.  And hemmed the bottom by hand.  Then all the little rings had to be stitched in place.

Then onto the window fittings, using L shaped brackets I attached the wooden batten to the window.  Put velcro on it and screwed in the eyelets that would guide the cord.  

Then lots of ironing and trying to get them to hang straight followed.  And that was one blind made!  the day after I made the bigger blind, same idea but more difficult and I had to be even more careful to keep checking it would hang straight.  I am pleased with the result.  The small one is shut every night and is standing up fine.  The big one never gets shut really as we aren't overlooked.  Glad I made them myself, much cheaper and I got to have the fabric that I liked.  Then I moved on to hanging curtains but that post will have to wait.  

Do excuse the lack of blogging at the moment but I am counting down the days till baby is due and trying to get things ready for Christmas.  Plus attending all the usual playgroups, swimming lessons and appointments plus Little L has come down with a stinker of a cold hhhmmm great timing. 

Bye for now.  


Thursday, 7 November 2013

New pram liners

I have been on a roll lately getting things done off the "Things to do before baby arrives" list and one such job was to make covers/liners for the new pram seats.  They are red and whilst the new baby will be in a carry cot or a footmuff for all of winter Little L certainly won't be in a footmuff.  In fact I do well to make her tolerate a blanket over her legs.  So I thought to avoid endless washing of the red padded seat liner I would make simple covers that can be washed and dried easily.

So months ago I bought a cheap red fleece blanket from Ikea (these blankets work out cheaper than buying fleece by the metre and the quality is fine too).  I washed it and it sat and lingered on my to do list for a couple of months at least until yesterday.  

When Little L had her sleep after lunch I got the sewing machine out, cleared the table and started cutting.  I simply cut the shape of the liner and then an extra section to form a flap on the back.  Hemmed it all (by the way I hate sewing with fleece even though I do have a walking foot for my machine my results are never great) and then set to marking out the holes (like large buttonholes) that would need stitching and cutting to allow for the seat harness to pass through.  This is quite fiddly and if you look closely some aren't straight but they will be fine. 
 I added a bit a ribbon to tie securely at the bottom and done.   
Plus I have half a blanket left which will be enough for a baby or toddler blanket.

Saturday, 21 September 2013

Snuggly for carrycot

I did this a few weeks ago but only just got around to posting it.  I bought the carrycot to go in the new pram and well it was pretty plain.  And the design is a bit stupid because it won't go in the washing machine (unless I'm missing something which is possible).  So the lining is a black cotton which won't stand up to baby sick that well I don't think!

So I had a hunt and came up with some fleece and calico

Then I simply measured and cut and sewed the two sides together and ta dah a little snuggly fleece mattress for the carrycot.    

Much more appealing for a newborn plus it will go in the washing machine

Saturday, 31 August 2013

A New Peg Bag

So my old peg bag had seen better days particularly since having a little helper to hand me the pegs it has ripped and been patched too many times.  So on an impulse during Little L's sleep this afternoon I got out my sewing machine and had a rummage through my material.  

None of which was particularly inspiring so a chose a piece of old oilcloth.  How hard can it be to sew???Well having finished said peg bag I have a new appreciation of why Cath Kidston oilcloth bags are so expensive.  The sides seams were easy, with right sides together the oilcloth goes through the machine easily.  But a couple of seams were wrong sides together so oilcloth outwards and the machine does not like that.  The feed doesn't work so you have to keep pulling it out as you sew.

Anyway the finished article is better than the one I had before and considering i had a helper for part of the task I don't think it looks too bad


Monday, 17 December 2012

Mini Christmas Sock

After an early start (P has been getting up at 5am for the last week or so for work and so this morning I just got up too as I never manage to get back to sleep until about 15 mins before I have to get up) me and little L were going for a walk down the canal. But despite what the forecast said today it has rained none stop !!!
 
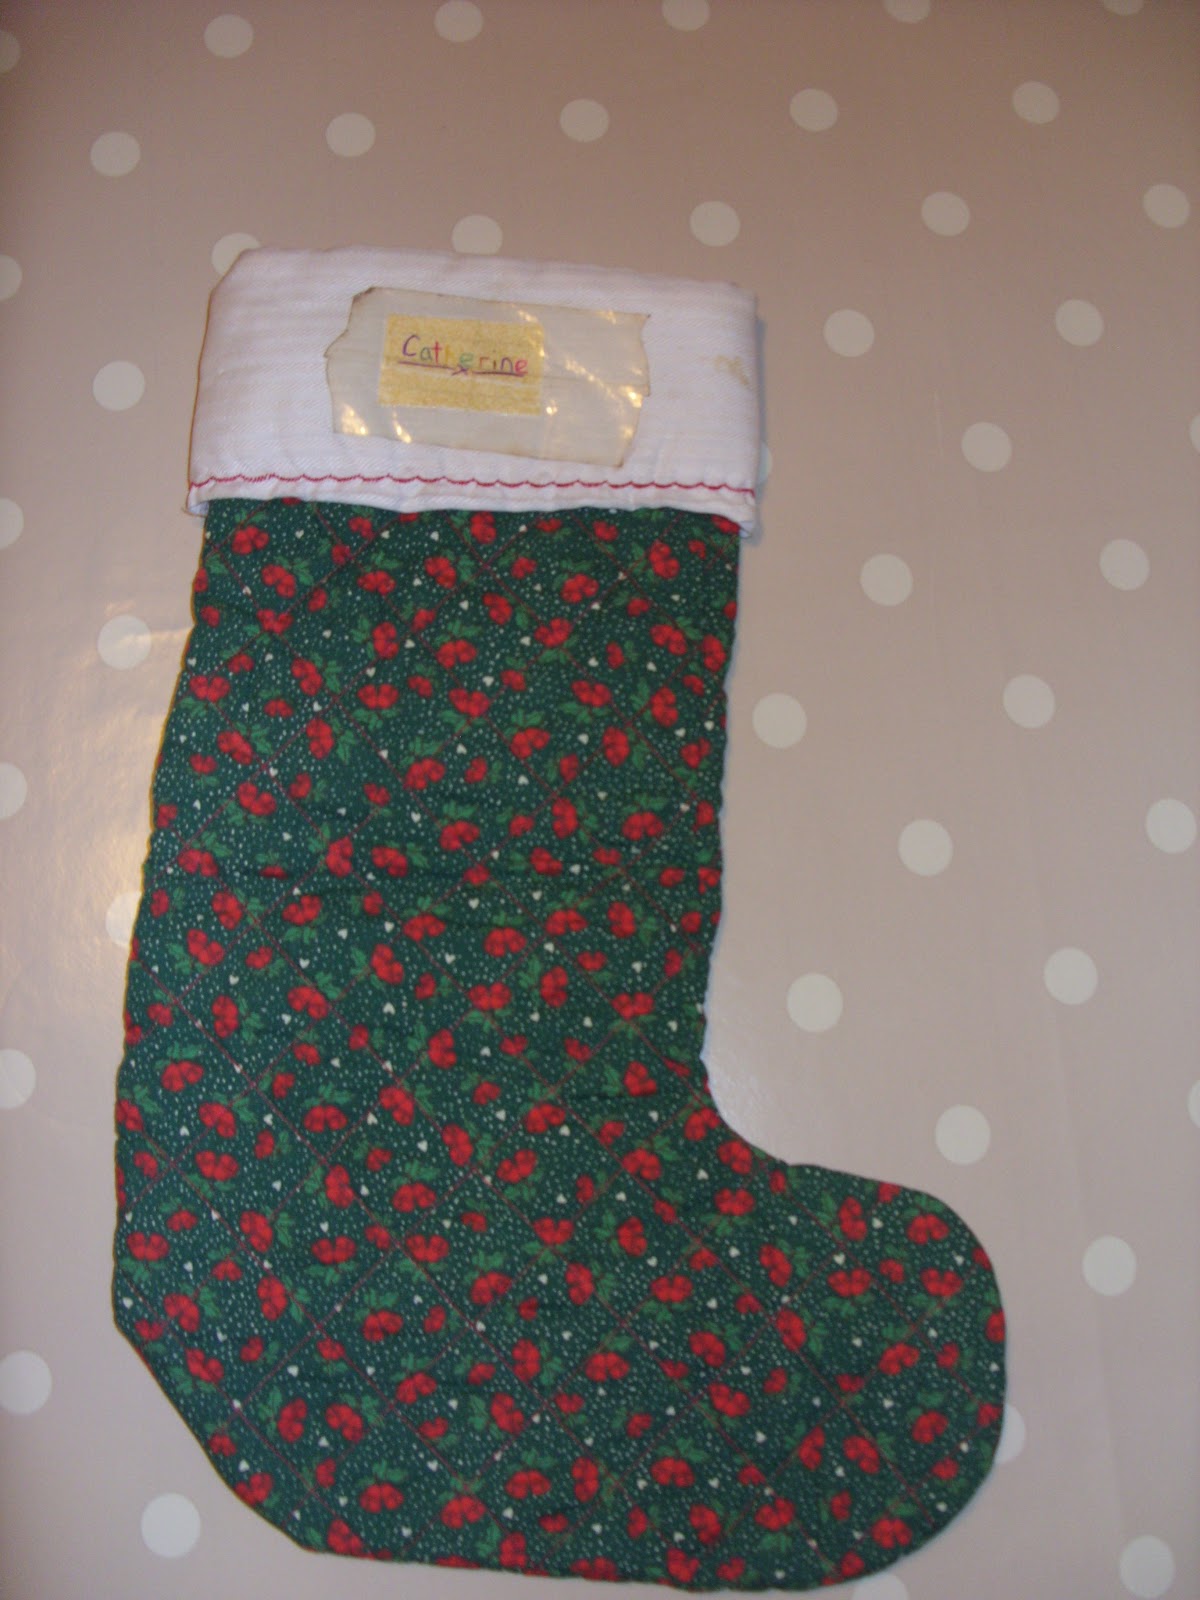
I decided to do a bit of crafting this afternoon (it was either that or cleaning up).  So I have a Christmas sock from when I was little that my mum made (it even still has my name on it). 
 
 
Little L has a Christmas sock which my Mum made her last year.
   
So I thought I could make a little sock to hang up,   I was going to knit one but thought felt would be much quicker.  I haven't used my sewing machine or done any sewing for a few months and it didn't quite go to plan.
I didn't flip my stencil over so I had two identical pieces .......... dohhh.
Anyway in the end despite contending with some very busy fingers trying to press the buttons on my sewing machine it looks quite good.
 
Must go as baby is still not asleep.  Hope to pop back soon x 

Saturday, 29 September 2012

Simple pinafore dress

I bought this pattern ages ago at the Knitting and stitching show in Harrogate last November (If you've never been I'd definitely recommend it).  I kept meaning to have a go with it but you know concentration, sewing machine and small baby do not go well together.  And I just can't start a sewing project at night.  I can knit, crochet in the evening but not sewing.  So the other day I had a look at the pattern and managed to cut out my pieces whilst little L was awake.  The pattern is so easy just two pieces of material.  It is an Emma Garry pattern Reversible Pinny (there are some lovely things on her website have a look and get ready for the serious I wants I needs). 
 
 Ideally use two contrasting fabrics and then the dress is reversible.  But I didn't have two so I used plain white cotton for the lining.  I had bought a selection of outer fabrics - a bright red flowery, a cute vintage rose and a blue animals print.  I chose the animals as I thought it would go well with navy leggings or jeans which she seems to be wearing a lot and the others I will make in the bigger size.
 
I traced the pattern onto some greaseproof paper and then pinned it to my fabric and cut out the two pieces.  Then I pinned them together and stitched them.  Easy and it looked good.  I nearly went ahead and finished it that night but I had a little niggly feeling that I should try it on little L to check that it fit.  So the next day I tried it on a tired baby after we got back from playgroup.  And she really didn't like it but then I realised a pin was sticking in her neck (naughty mummy!).  It didn't fit at all.  So I turned it inside out and made the straps and neck opening bigger.  Still didn't fit so then I attached buttons and get me I used the fancy nancy automatic button hole foot on my machine!! 


It still doesn't fit hence no photo of it on.  The size was 2 and she is only 16 mths.  The armholes are just too tight.  Shame as it looks lovely.  I will make another as I have the pattern in size 3 but I'm not convinced that would be big enough. 
 
 
This would be nice in lightweight corduroy or a nice christmassy material? 
Bye for now x

Sunday, 9 September 2012

A new old basket

Last Sunday we had a trip to Preston to join in with the Guild celebrations.  On Saturday and Sunday they had a Vintage weekend in Avenham Park.  There was lots to see and lots of stall oh I wish I had some pennies.  It was mad busy and really hot but we had a really good day with my sisters and their families and my parents. 


Little L had chance to show off her cute new shoes!
 
And on the way out I spotted a basket for sale and after a bit of haggling it was mine.  I wanted an old traditional basket to put my knitting in to stop it getting tangled up and to be able to quickly put it out of reach from little fingers.
 
I decided to line it as it was too snaggy for knitting as it was.  So I chose this material mainly because I had lots of it.
 
I cut a template for the bottom of the basket and then a rectangle for the sides.  I measured around the top of the basket and added an inch for hems and roughly measured the depth of the basket and added a couple of inches to turn over at the top.  I stitched the short ends of the rectangle, to give a tube of fabric.  Then I pinned it to the base oval of fabric.  I pinned it first on the four flat sides of the oval and then gathered and pinned folds into the corners or curvy edges.  It sounds complicated but it wasn't.  I was doing it at fifty miles an hour with one eye on little L and I managed it.  
 
Then I cut a slit down either side for the handles and hemmed it (sorry forgot to take photos).  Then I stitched a channel around the top.  I threaded some thin elastic through the channel and around the handles to hold the lining in place.
 
Done, not bad for a couple of hours and it will do the job.  I had to put a little band of material on the handle because there is a crack in the handle which I just had to put some gaffer tape around.
 
Hope you have all had good weekends. 
Bye for now x


Related Posts Plugin for WordPress, Blogger...